
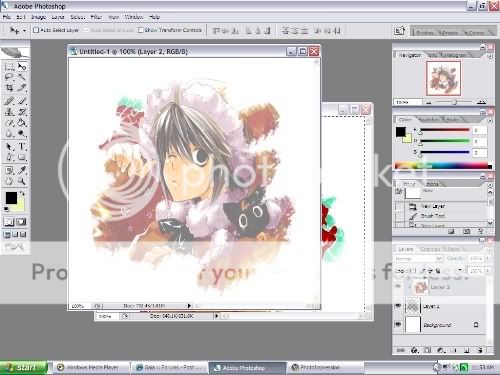
So, yeah, I'm going to show how it's done. It's really not that hard, clipping a picture. By the way, I'm using PS CS2, I'm sure the other photoshops, and psp can do this too. And I'm using a picture of L, from Death Note, which you saw in that example up there.
:]
Step One:
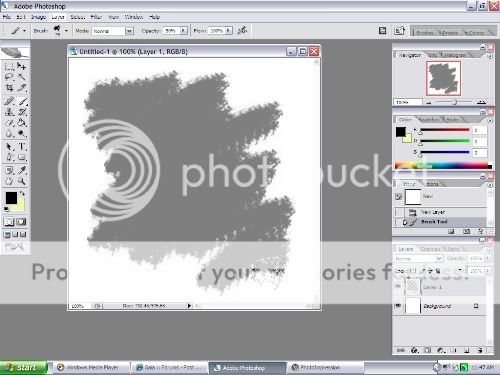
First off, you'll need to open a blank canvas. It can be any color you want. It can even be transparent!
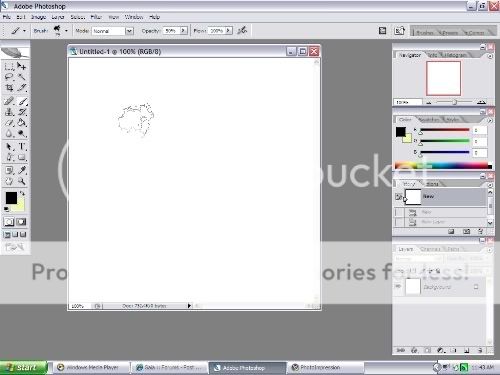
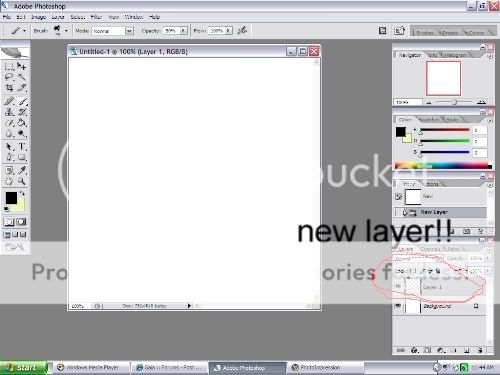
Step Two:
This is important. Make sure you create a new layer(ctrl+shift+n).
Step Three:
Next, just take a desired brushed, preferably something not to big, and maybe with funky eges to it. But using a circle or a square brush is alright too. It doesn't matter what color you make it, but usually, the color you use, affects the outcome of the picture later. Anyways, take that brush, and do some funky scribble across the canvas. Make sure that this scribble is drawn on the new layer, not the background.
Step Four:
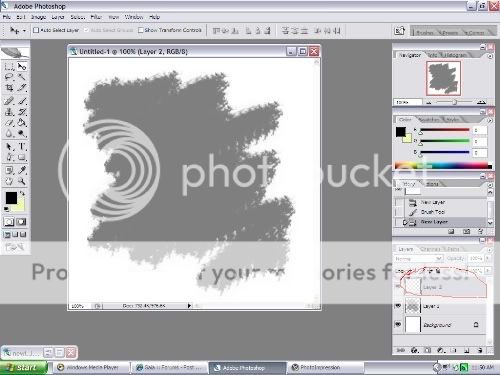
Make a new layer :]
Step Five:
Where I drew the red line(in the picture) hover your mouse over that area, white hitting the "Alt" button. A weird circular thing should pop up where your mouse is. When it does, click down on your mouse, and a little arrow should pop up next to the layer you just made. That means, whatever you paste into there, the only part that will show up, is the one inside the clipped area(I hope that made sense)
Step Six:
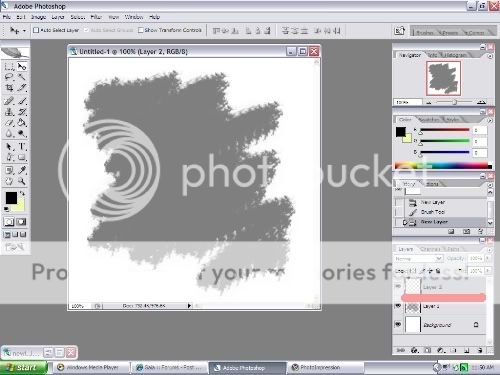
Once you have your clipped area, you're almsot done! Wohoo. Now, make sure you select the layer with the arrow on it. Take the picture you want clipped, and drag it into that layer with the arrow. The picture should now have the shape of your scribble.
Step Seven:
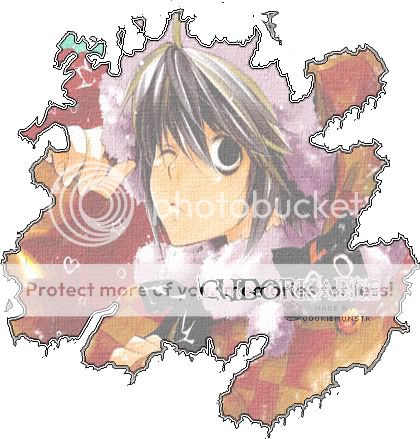
No you can do whatever you want! Here's what I got with mine:
Uhm, I hoped that helped! If anyone has questions, PM me, or post it here.
If I messed something up, or whatever, PM me. Okies?
;]