Welcome to Gaia! ::

The Official Sims 2 Guild

Back to Guilds

Great place to share/show your creations and meet other TS2 fans! 

Tags: Sims2, Simulation, Maxis, Electronic Arts, Social Bunny 

Reply The Sims 2 Help
Tutorial: How to recolor with the Gimp

Quick Reply

Enter both words below, separated by a space:

Can't read the text? Click here

Submit

The heart of reality

5,500 Points
  • Elocutionist 200
  • Conversationalist 100
  • Citizen 200
PostPosted: Thu Aug 02, 2007 3:01 pm
Hello, everyone! I thought I should post this tutorial for recoloring with the Gimp. It should be fairly simple to follow.

What will you need?

Bodyshop-
This will come with the base game, and you will need it to export any meshes for creating anything in CAS.

Gimp- The tutorial covers recloring with Gimp, so you'll need it. It is free to download, and has some great filters. You can download it Here. Note: You have to download the runtime enviroment and install it first, before you install Gimp itself. If you have Windows 2000 or higher, download The first runtime enviroment, second on the list. If you have anything before 2000, then download the third in the list. A tutorial for downloading and installing the Gimp will be done by yours truly soon.
 
PostPosted: Thu Aug 02, 2007 3:20 pm
Step by Step

1.) First, open up body shop. Select Create->clothing. We'll be doing a dress, just for simplicity. Select the dress shown below. It is under formal, from the base game.

User Image


2.) Give it a simple name, in thjis case, I've named it Dress_Tutorial. Click the checkmark button. It will export the mesh and texture, creating a new file in Projects.

User Image


The heart of reality

5,500 Points
  • Elocutionist 200
  • Conversationalist 100
  • Citizen 200

The heart of reality

5,500 Points
  • Elocutionist 200
  • Conversationalist 100
  • Citizen 200
PostPosted: Thu Aug 02, 2007 3:30 pm
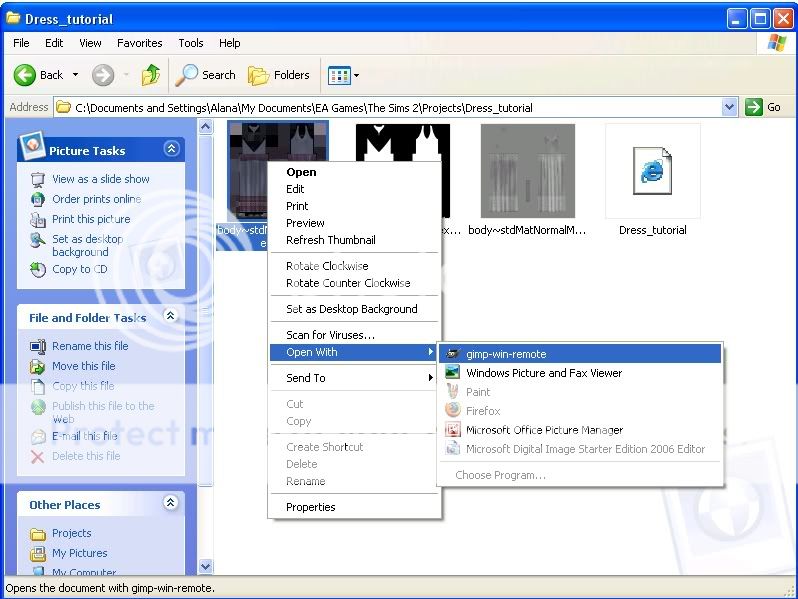
Step by Step, three and four

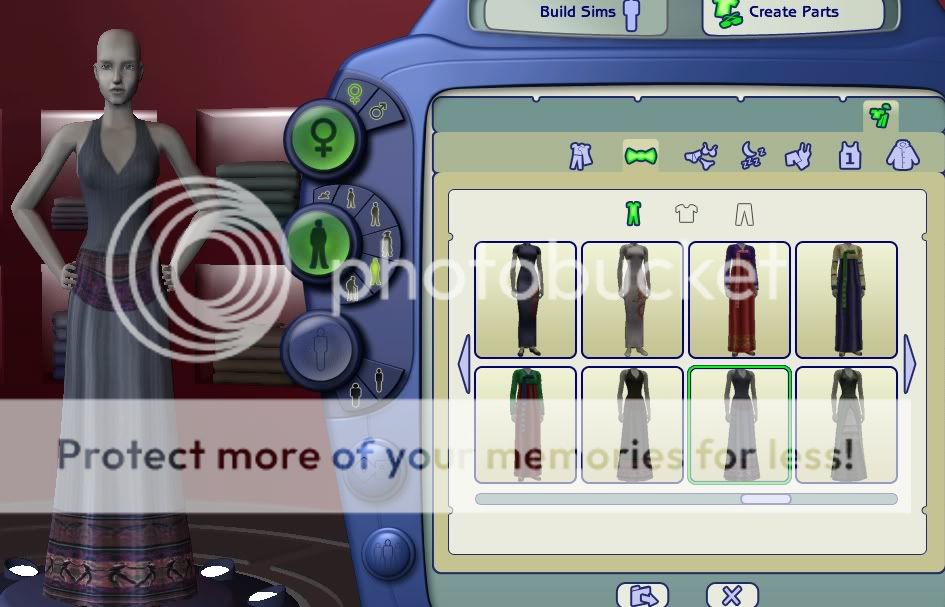
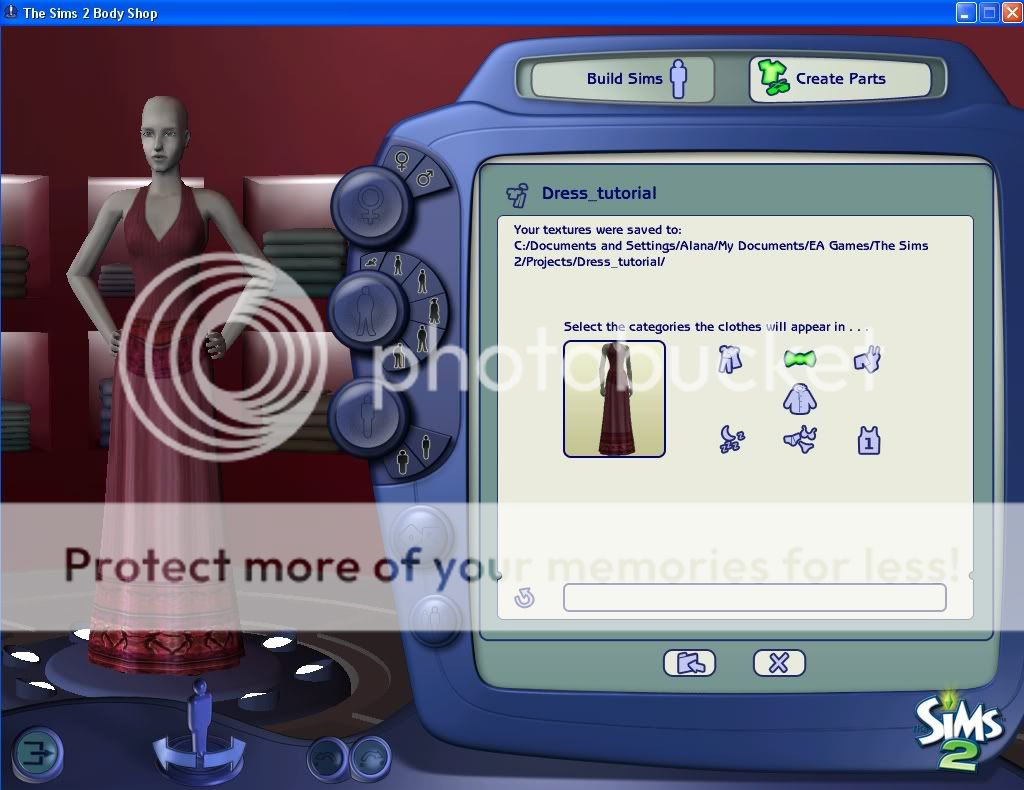
3.) Exporting will take you to the page below. This is where you decide what categories the new custom will show up in, as well as adding a tool tip. That little thing that comes up when you hold over something in CAS. Anyway, find that folder specified at the top. It should be Under documents->EA Games ->The Sims 2 -> Projects. Once in projects, double click on the folder named what ever you named the project.

User Image


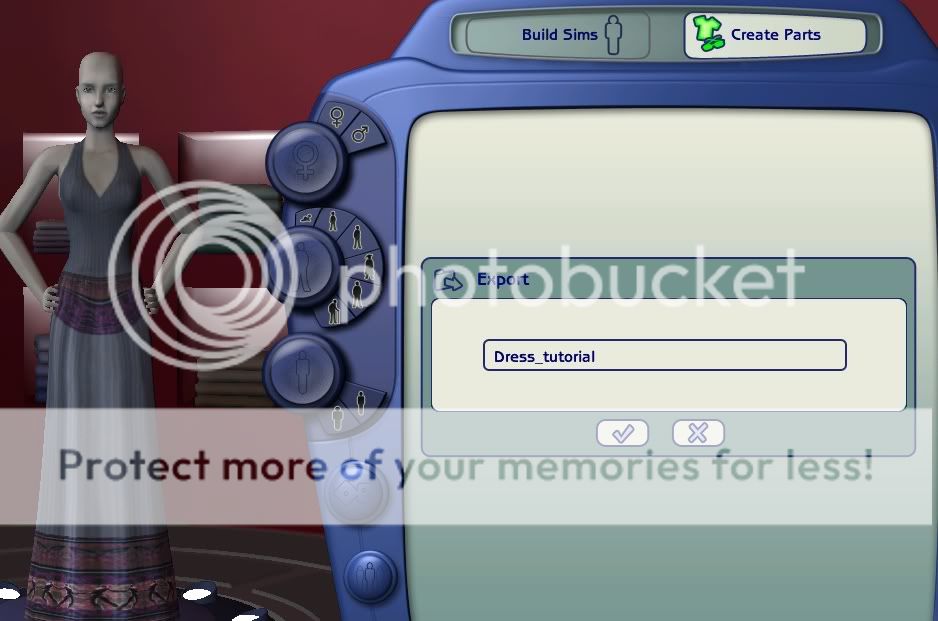
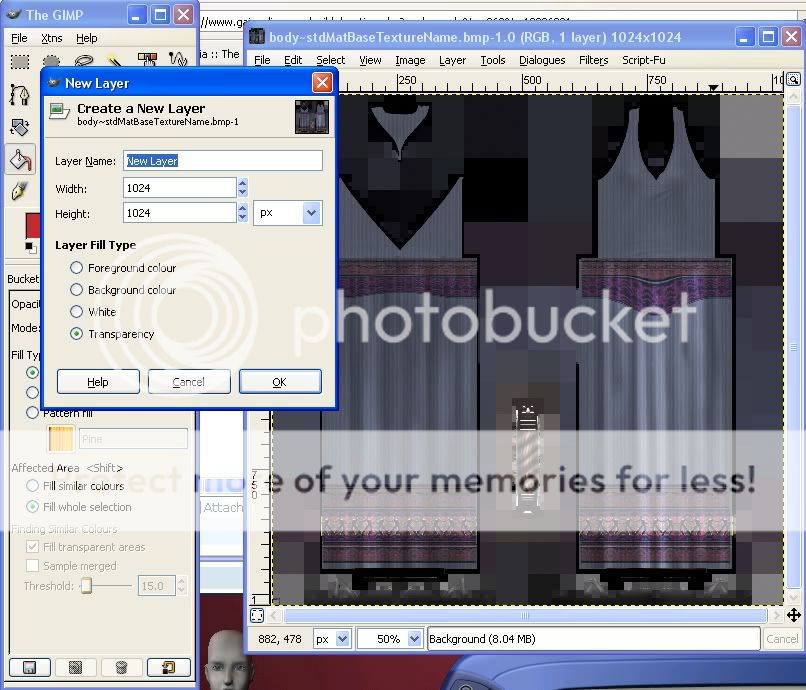
4.) Once you open the folder, you will see the below picture. Some alphas, which you won't worry about unless you decide to edit the alpha. If you add something to it, for exapmle, it will be skin tight. Anyway, select the first with the texture, also known as the one with color. Rightclick, and select open with->GIMP.

User Image
 
PostPosted: Thu Aug 02, 2007 3:46 pm
Step by Step, five and six

5.) Once Gimp has loaded, select the tool circled here. The bucket shaped one. This is the bucket tool, which will cover our canvas, as I will refer to it. Check that the Fill type is set to FG color fill, and that Affected Area is set to Fill whole section.

User Image


6.) Select 'Layer' from the top of the canvas, and click 'New Layer.' I usually don't name it, but you can name the layer anything you want. Click OK, and you now have two layers on the canvas.

User Image


The heart of reality

5,500 Points
  • Elocutionist 200
  • Conversationalist 100
  • Citizen 200

The heart of reality

5,500 Points
  • Elocutionist 200
  • Conversationalist 100
  • Citizen 200
PostPosted: Thu Aug 02, 2007 4:05 pm
Step by Step, seven and eight

7.) Make sue you still have the bucket tool selected, click on the canvas. Before you yell at me, saying, "REALITY! You spoiled it!AHHHHHHHHHH!!!" Relax! The second layer is just covering the first. The original texture is just fine. Just click 'Dialogues...Layers' This will allow you to modify the layers to your heart's content.

User Image

8.) Welcome to Layer modifying central. Now, select the little icon with the color you just covered the canvas with. You see where it says Normal? Click it, and select any filter you like. Right now, select 'Overlay'. This will change the image to the below image. Play with the filters all you like. But remeber: using a dark color for the second filter will NOT WORK. It will come up dark, no texture seen. Click the 'X' in the color.

User Image
 
PostPosted: Thu Aug 02, 2007 4:13 pm
Step by Step, nine

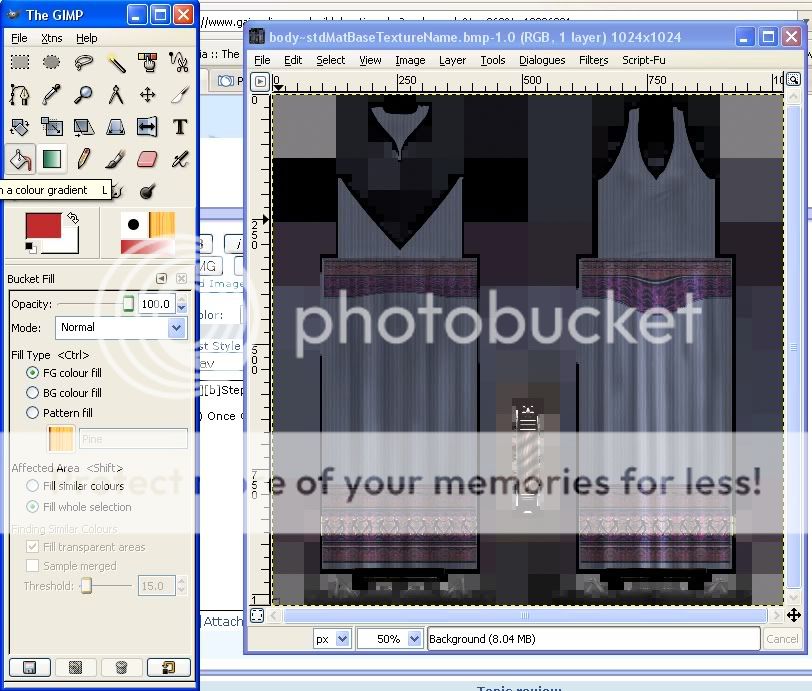
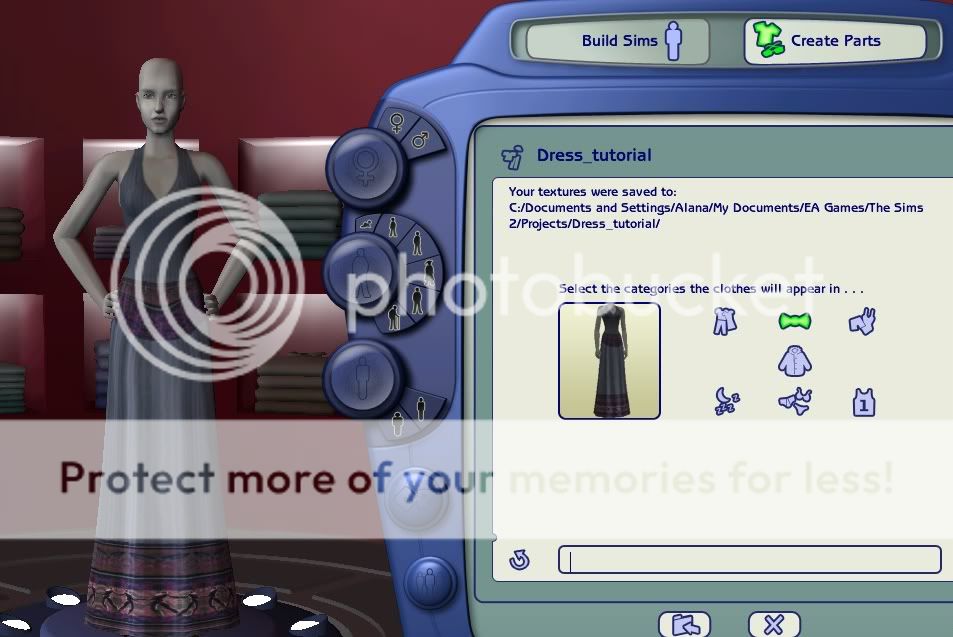
9.) Save it...That's important. If a messge comes up when you do, saying Gimp cannot save the file, just click 'Export' and try again. If you get it twice, click ignore. The file will still save. Before you leave the Gimp, refresh Bodyshop.

User Image

And, you are done! Just export it to your game, and you can play! Congrats, and good on you!

Please post any questions in the thread, and I will awnser them happily.
 

The heart of reality

5,500 Points
  • Elocutionist 200
  • Conversationalist 100
  • Citizen 200

kaiser321

PostPosted: Sun Jun 15, 2008 7:42 pm
This is more of an addition instead of a question but, I learned that this method could also work in recoloring hair.  
PostPosted: Mon Jun 23, 2008 5:33 am
I works for recolouring anything. Be it accessories, hair, eyes...Whatever. I just used the dress as an example.
 

The heart of reality

5,500 Points
  • Elocutionist 200
  • Conversationalist 100
  • Citizen 200
Reply
The Sims 2 Help

 
Manage Your Items
Other Stuff
Get GCash
Offers
Get Items
More Items
Where Everyone Hangs Out
Other Community Areas
Virtual Spaces
Fun Stuff
Gaia's Games
Mini-Games
Play with GCash
Play with Platinum