|
|
|
|
|
|
|
|
|
 Posted: Tue Jan 26, 2010 4:37 pm Posted: Tue Jan 26, 2010 4:37 pm
 |
|
|
 |
I'm going to try something new. To keep encouraging myself, and provide a tutorial, I'm going to post pictures of my progress and the steps I took. I keep track of my progress; you get a tutorial for a costume. Simple, right?
Hige-Wolf's Rain

Difficulty: Beginner/Easy.
Cost: Thrift-store. It's cheaper to buy the clothes and modify them than to make it from scratch.
Equipment:
Sewing machine or thread and needle, pins, seam ripper, tweezers, scissors, measuring tape. A rolling hem foot is optional.
Materials: *note* most materials are bought made. If you want to spend the time and money, you'll also need patterns.
One yellow hoddie. Make sure the sleeves aren't too baggy.
One charcoal-grey sweater. Again, the sleeves are baggier than they look.
Light blue/grey pants. NOT jeans.
Black fabric. Get the same type as the hoodie, usually knitted cotton.
Black collar for a LARGE dog. If you can get collar with a plate already installed, you'll have an easy job.
Black/charcoal sneakers. I'll show you a close up when I get mine's.
Long black shoestrings, as long as you can get them. it should be able to wrap around your waist with some left over.
Finish Date: For Megacon, March 12th-14th.
STEP 1: Ripping
STEP 2: Stripes
STEP 3: Finishing the top (Step not completed)
STEP 4: Finishing the pants
|
|
|
|
|
|
 |
|
|
|
|
|
|
|
|
|
|
|
|
|
|
Posted: Wed Jan 27, 2010 8:54 am
|
|
|
|
STEP 1: Ripping
This includes a brief tutorial on how to use a seam ripper. Skip to the bold to see what you need to rip. Danger! These are very, very sharp. Please use caution. I've ripped my thumb open with one of these before; you can use a (safer)very small pair of scissors if you want, but it's easier with a ripper. And rippers only cost you 2 bucks at JoAnn's...
Start with the hoodie. Look very closely at the sleeve. See how the end of the sleeve and the cuff make a cross? You'll want to start on one side of the cross, where the cuff and sleeve meet. Gently pick up a stitch, making sure you don't catch any fabric, and slide it down until it cuts. Pull the cuff and sleeve apart gently and you should see the beginning of a small hole. Move to the next stitch.
(note: I already ripped up my hoodie, so I used my sister's... it should be yellow, not green.)
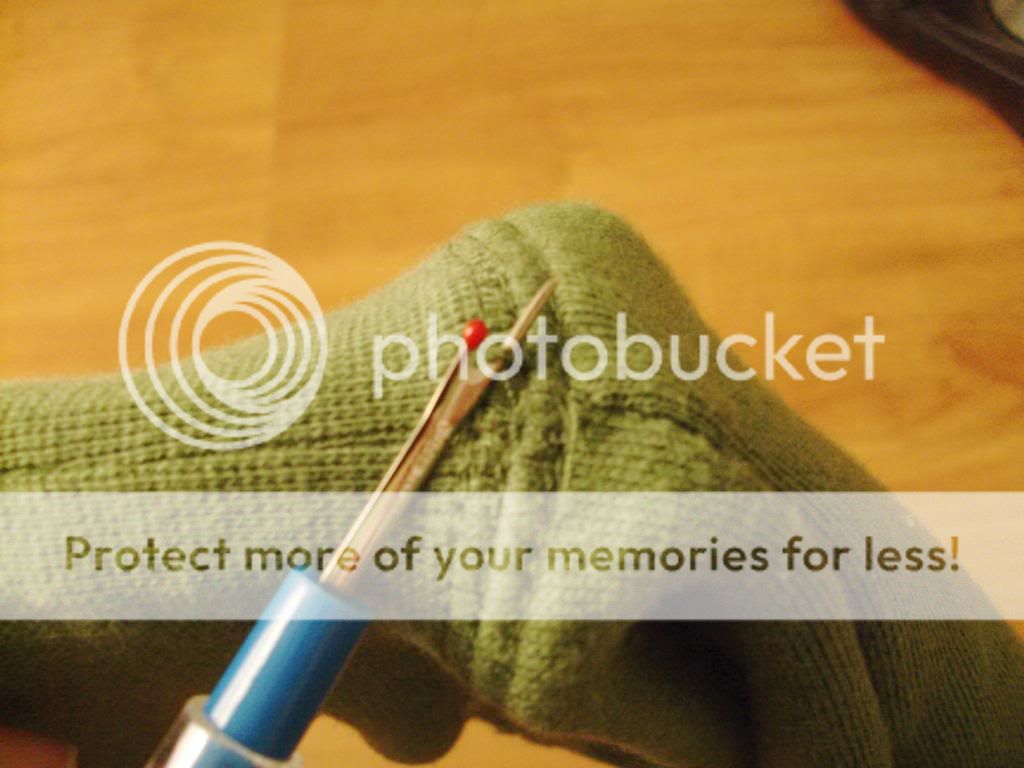
As you work, you'll see that more stitched come undone by themselves. It gets easier as you move on. Just keep moving until your cuff is separated from your sleeve.
Next, you'll want the cuff off of the sweater. Follow the same process as above, but be very careful at the end. you want the seam that runs all the way up the sleeve as intact as possible.

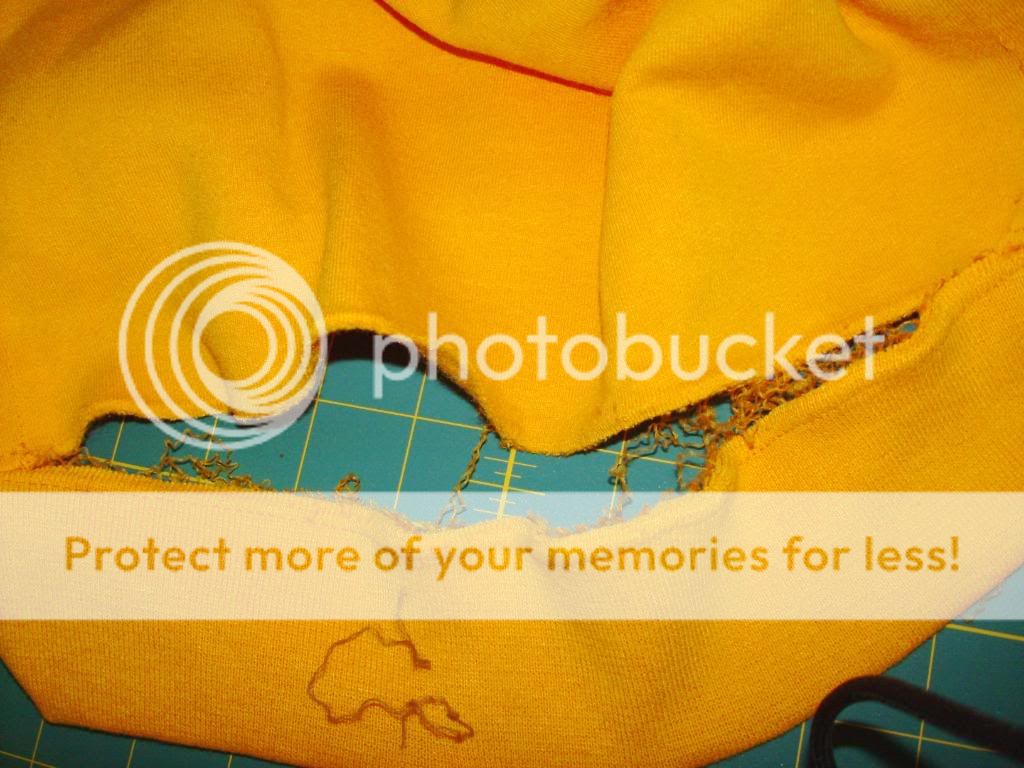
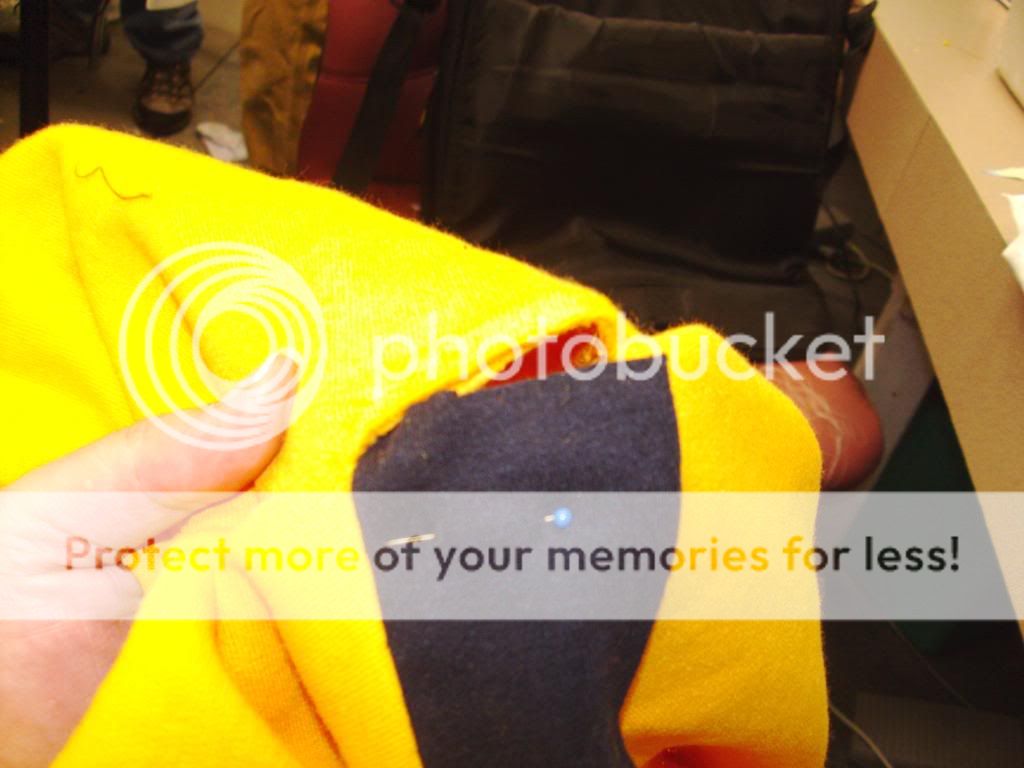
Now if your hoodie has a pocket at the front, you'll want to get rid of that. I know he has pockets in his hoodie, but it's not that ugly thing at the front. I'll show you how to make those. Again, when you are ripping this, make sure you don't catch any fabric as you rip. You'll have an ugly hole on the front of your costume if you do.
As you detach the bottom of the pocket, you'll notice that the bottom seperates from the top of the hoodie. Don't panic, this is normal; we'll fix it.
Finally, if your hoodie doesn't have a black drawstring, look at the top part of the hood. If there are stitches holding the drawstring in place, carefully undo these. Don't pull the string out, though! You can use this for later, trust me...
If you already know how to use a seam ripper...
Rip off the cuffs of the hoodie and the sweater, being carful not to undo the seam that runs up the sleeve. Rip off the pocket on the front of the hoodie, and any stitches that are holding the drawstring in place.
|
 |
|
|
|
|
|
|
|
|
|
|
|
|
|
|
|
|
|
|
|
|
|
Posted: Wed Feb 10, 2010 7:19 pm
|
|
|
|
STEP 2: Stripes
You'll need four stripes; two for the sleeves, and two for the pants.
Using the black fabric you bought, (should be the same material as the hoodie) cut out four strips about 2-2.5 inches wide. The stripes for the sleeves should be long enough to start at your shoulder, and hang a few inches past your elbow. The two for the pants should be long enough to hang from your waist to the bottom of your pants. For me, it's about 15 inches and 30 inches, but if in doubt, go longer. It's always better to get too much fabric and cut some off than to not have enough.
Make sure that your stripes don't start at the ugly edge of the fabric, or it will show on the finished product.

I used a rotary cutter (DANGER! SHARP!) to cut my stripes, but a pair of scissors and a ruler will work just fine.
If you want, you can either hem the sides or embroider to edge your stripes, but I'm going to do an embroidered edge.
Hem:
For this, you want to cut your stripes wider that the final width. if you want to make a 1/2 inch hem, you'll need to cut your stripes 3 inches: 1/2 inch for hem, 2 inch for final width, 1/2 inch for hem.
Fold the edge, up to how big your hem is (1/2 inch in my example) and pin it along the whole stripe. This is not my video, but it'll give you the idea.
If you have a rolling hem foot, you can use that to hem your stripes. Be sure to test your fabric with the foot, sometimes certain fabrics curl with a rolling hem. *does not have a video for rolling hem, and is too lazy to make one.*
Once you have hemmed your stripes, pin them in place. Read on for specific details and follow the directions, paying special attention to notes with Hemmed:
Embroidered:
Cut your stripes to the exact width you want them. We're going to start with the hoodie. Pin them in place, leaving some extra where the hood meets the shoulder. Try it on to see if it's in the right location.
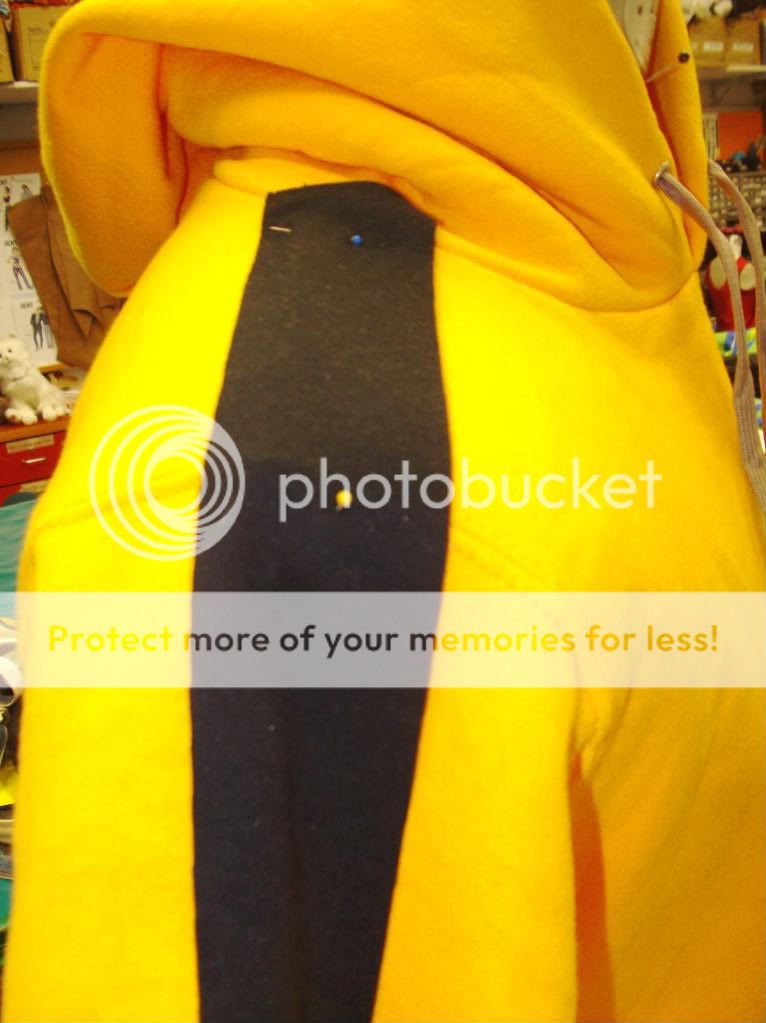

Using your seam ripper, open up just enough room between the shoulder and the hood to fit the stripe inside. You may also have to open up the sleeve entirely flat, in order to be able to sew the stripe.
Baste the stripe on both sides, as close to the edge as possible. To baste, set your machine on the longest stitch length possible, usually 4. (Hemmed: Stitch length 2-2 1/2. Once you attach it, you're done.)
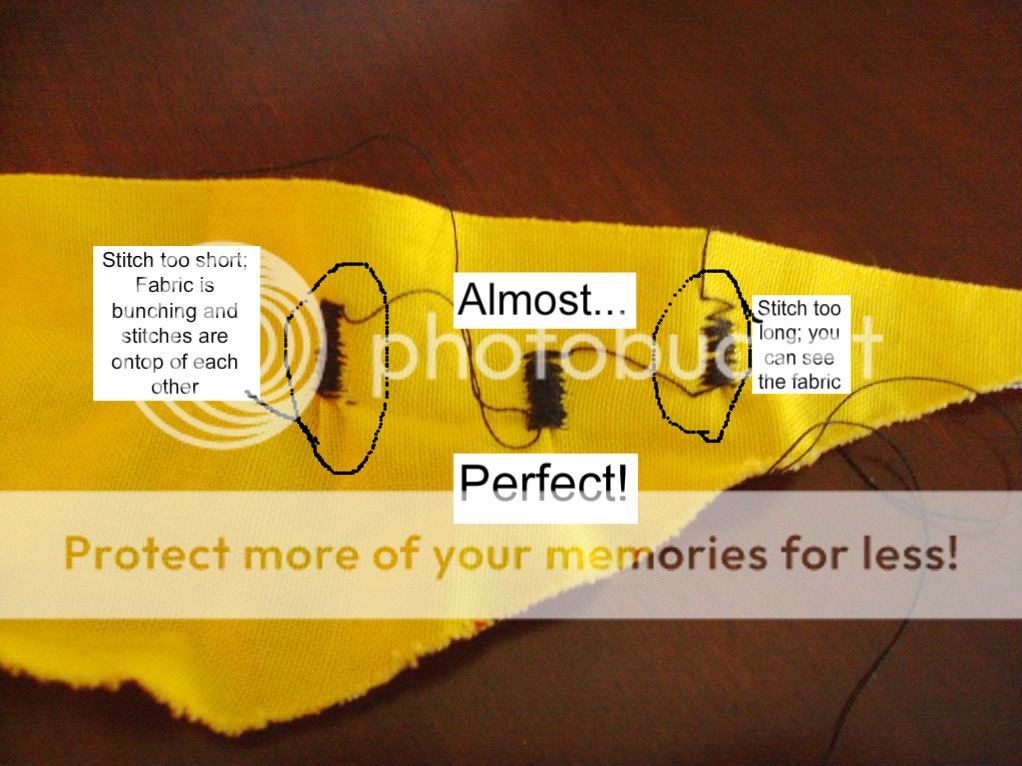
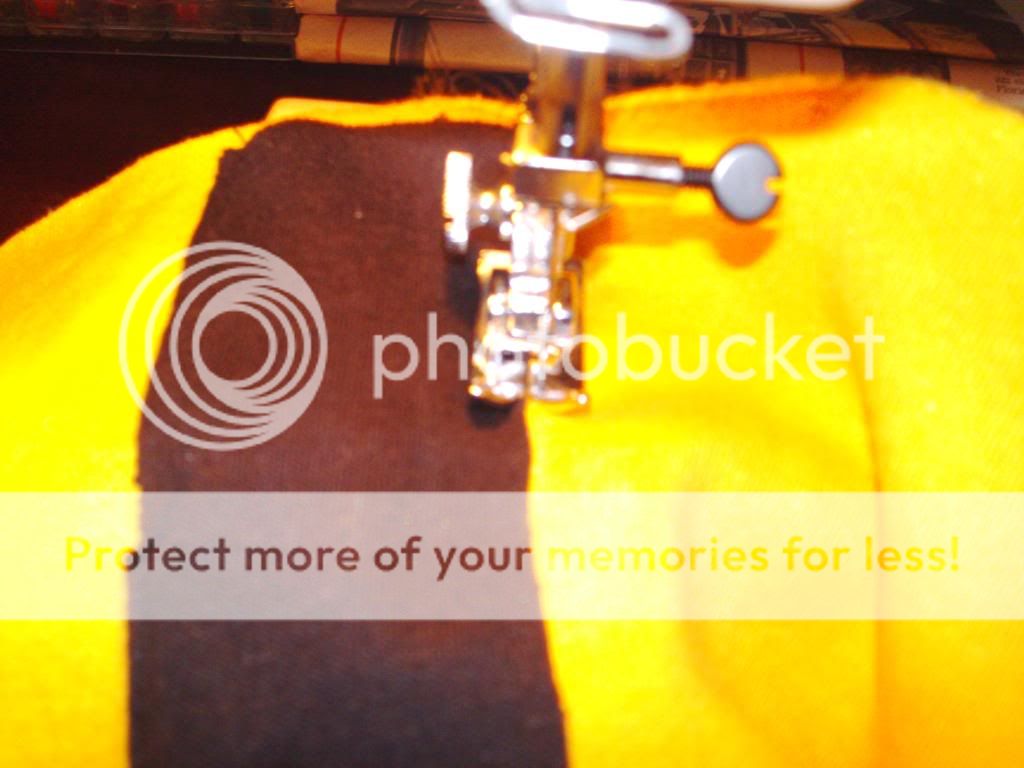
Now to embroider. Set your machine to do the widest zig-zag stitch as possible, and the shortest stitch length that will put stitches directly next to each other, but not on top of each other. Use a scrap pice of fabric to test it out. Adjust the stitch length so you can see non of the fabric underneath.
After you have the perfect setting, sew up the stripes, with the edge just in the middle of the stitch. make sure you're not accidently sewing your sleeve to itself, but ripping it flat should have solved this.
Now to the pants...
Pretty much same as above. Hem your stripes if you're hemming, and pin them in place and try them on. Baste on the stripe if you're embroidering, or sew them on if you're hemming. Finally embroider if that's the way you roll.

|
|
|
|
|
|
|
|
|
|
|
|
|
|
|
|
|
|
|
|
|
Posted: Wed Feb 10, 2010 7:30 pm
|
|
|
|
STEP 3: Finishing the top (still WIP)
Alright, time to finish the hoodie and the sweater!
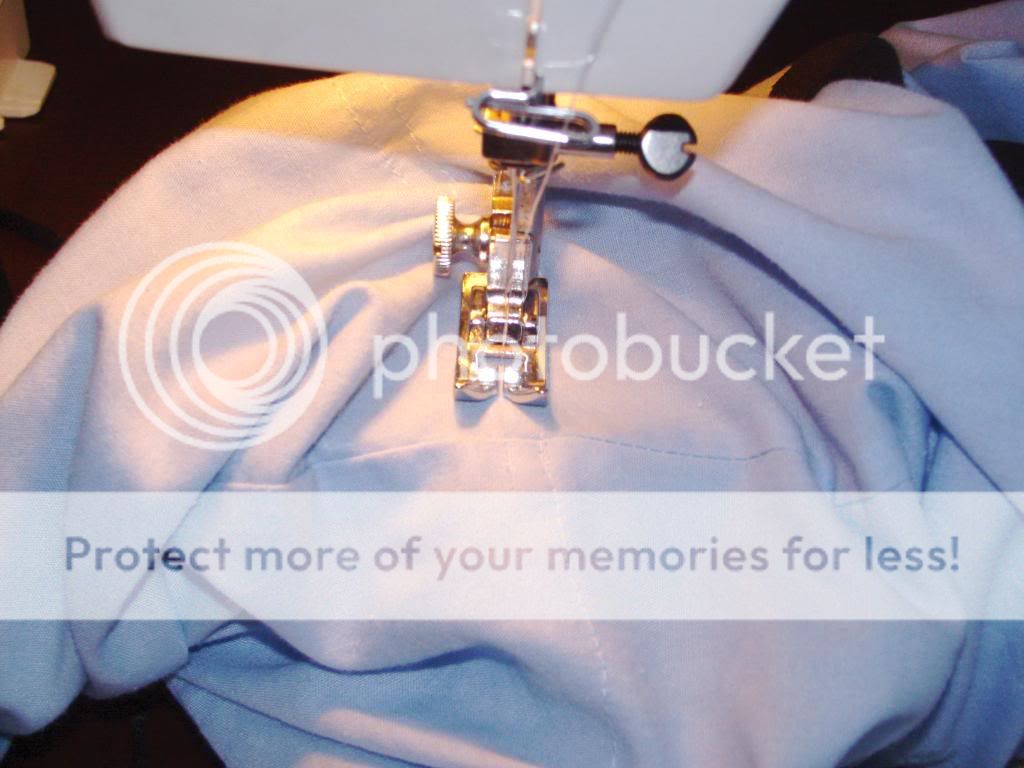
First, you'll want to cut the sleeves off the hoodie. Put it on and mark on the sleeve a point where it's about 1-2 inches past your elbow.
*Note* The sleeves should be ABOVE his elbows, but you want yours BELOW your elbows! This is so we can pin it to measure exactly where we want it, and so we can make a nice hem.

I hope you're saving ALL fabric you cut off! 3nodding
Sew up the hole at the bottom you made with step 1. usually the fabric doesn't match up perfectly; make sure to pin carefully, so you do sew it uneven on accident. your pinning should look something like this:

Sew that closed.
Next, sew up the holes near the hood that you made in step 2, making sure that the stripe goes inside before you sew it up. Also, sew your sleeves back up so they're closed.
Finally, get one of your shoelaces, and tie/tape/safety pin it to the drawstring already in your hoodie. Use the drawstring to pull your new drawstring through the hood. If it's too long, measure how much you need to take off, take out your shoelace, and cut it out of the middle, sewing the halves back together with a zig-zag stitch.
For the sweater, just hem the sleeves to the point that they fit you, and you're done.
Still to do:
-Hem the sleeves
-Add pockets
|
|
|
|
|
|
|
|
|
|
|
|
|
|
|
|
|
|
|
|
|
|
|
Posted: Mon Mar 08, 2010 8:31 pm
|
|
|
|
Step 4: Finishing the pants
This is fairly easy, but can be complicated, because everyone's pants are different. To do this, I will divide the work into 3 steps, and tell you how I did mine. Hopefully, this can help you, even if you need to do something different.
Part one: Tailoring
This part is just making sure the pants fit you. Mine's were huge, I had to pull them halfway up my chest in order for them to fit me. Remember, though, they need to be baggy.
I solved this by rolling down the waistband to the proper length, and sewing the bottom edge down in place. This made the pants the right length and also added a place for my drawstring, which is part two.
Part two: Drawstring
I cut two holes in my new waistband, and pulled my second shoelace through, trying them on to see if they hung in the right place.
The waistband was still too big however, so I added in a second hidden drawstring, so I wouldn't have to keep pulling up my pants. The second drawstring was necessary, because if you look carefully, the visible drawstrings aren't tied.

Part three: The Knees
There are two seam lines just underneath the knees. I simply added them after putting on my stripes, being carful hot to go over them. I used the same color thread as the pants, and did two simple rows of stitching. If you want, you can cut your pants twice and sew them back together to make real seams, but you would have to do it before you put on your stripes.
They are a little hard to see in this picture:
|
|
|
|
|
|
|
|
|
|
|
|
|
|
|
|
|
|
|
|
|
|
|